
Introduction
Here we are; part 2 of the Serverless React App series. As a DevOps Engineer, I appreciate this part of the project. Don't get me wrong; I enjoy the entire stack, but automating building, linting, and testing is so refreshing. Knowing that newly introduced code is formatted correctly, and tests don't fail before merging into develop makes development much more enjoyable for me. Because everybody reading this is probably creating merge requests and having their code reviewed, it most likely will for you too.
Table of Contents
- Introduction: Serverless React App
- Part I: React App with Material UI
- Part II: Lint, Test, & Build with CI/CD
- Part III: Deploying to AWS
Tests
Our React App comes with an example test file called App.test.js right next to the App.js file. To run this test, run npm test from the project root. You will notice that our test does not pass.
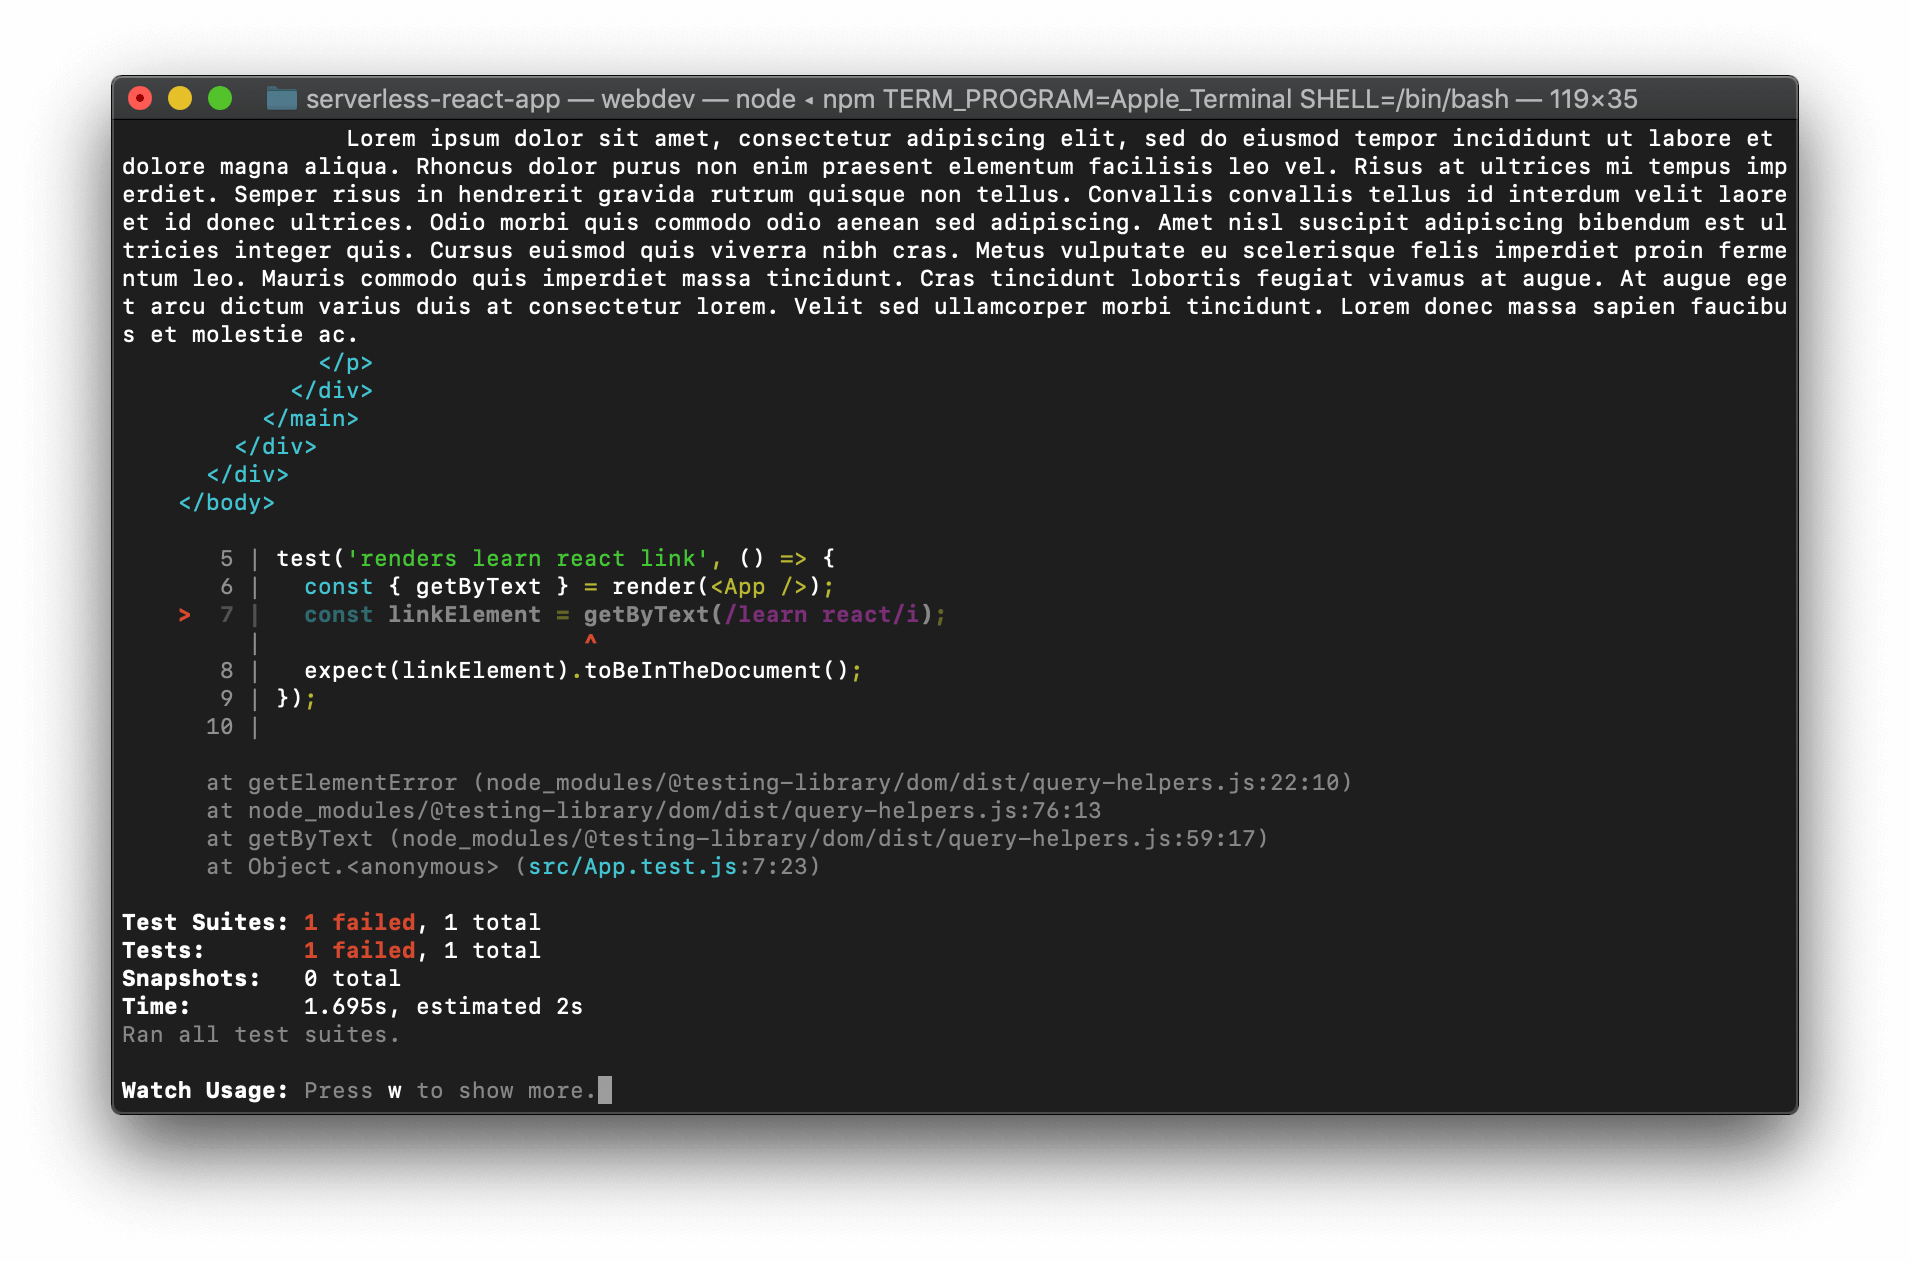
In Part I, we changed the elements on the page so the text learn react is not present. Let's update this test to look for something we do have on the page: serverless react app.
import React from 'react';
import { render } from '@testing-library/react';
import App from './App';
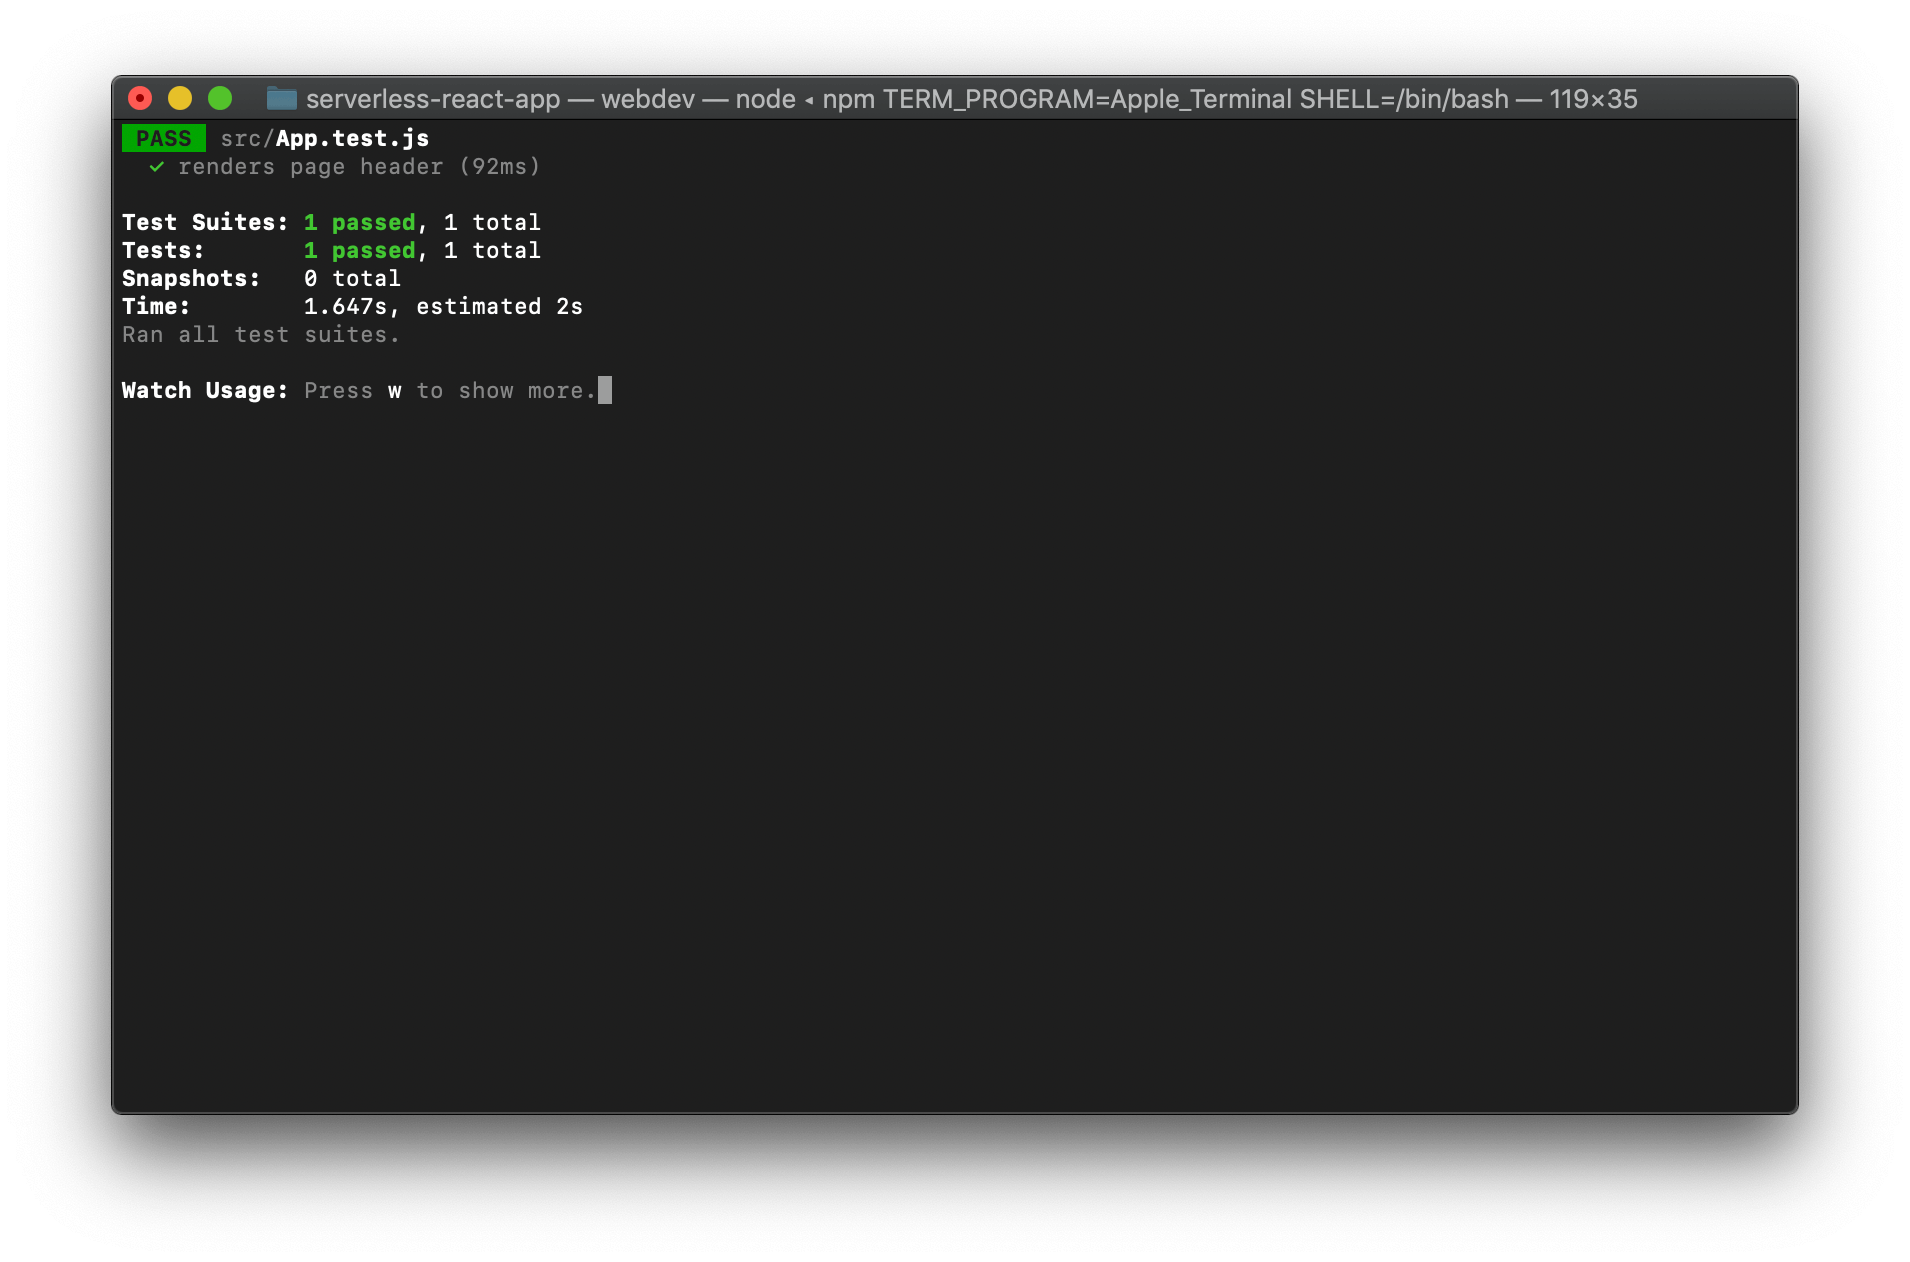
test('renders page header', () => {
const { getByText } = render(<App />);
const textElement = getByText(/serverless react app/i);
expect(textElement).toBeInTheDocument();
});Run npm test, or if you left the tests running, you should already see the results.
If you want to learn more about testing in React, hop on over to the React JS Testing documentation. Fully testing our application is outside the scope of this post.
Linting
The purpose of linting is to ensure all our code follows the standards we define. To get started linting, we need to install a couple of packages.
npm install --save-dev eslint eslint-config-airbnb eslint-plugin-import eslint-plugin-jsx-a11y eslint-plugin-reactNow that eslint is installed, we need a way to call it. To accomplish this, we will update the scripts section in our package.json file. I have made a couple of modifications to package.json and removed the initial eslintConfig section, removed the eject script, and finally added the lint script. See our finalized version of the file below.
{
  "name": "serverless-react-app",
  "version": "0.1.0",
  "private": true,
  "dependencies": {
    "@material-ui/core": "^4.9.0",
    "@material-ui/icons": "^4.5.1",
    "@testing-library/jest-dom": "^4.2.4",
    "@testing-library/react": "^9.4.0",
    "@testing-library/user-event": "^7.2.1",
    "react": "^16.12.0",
    "react-dom": "^16.12.0",
    "react-router-dom": "^5.1.2",
    "react-scripts": "3.3.0"
  },
  "scripts": {
    "start": "react-scripts start",
    "build": "react-scripts build",
    "test": "react-scripts test",
    "lint": "eslint ."
  },
  "browserslist": {
    "production": [
      ">0.2%",
      "not dead",
      "not op_mini all"
    ],
    "development": [
      "last 1 chrome version",
      "last 1 firefox version",
      "last 1 safari version"
    ]
  },
  "devDependencies": {
    "eslint": "^6.8.0",
    "eslint-config-airbnb": "^18.0.1",
    "eslint-plugin-import": "^2.20.1",
    "eslint-plugin-jsx-a11y": "^6.2.3",
    "eslint-plugin-react": "^7.18.3"
  }
}
There are only two more files we need before we can lint our code. First, we need a file to define our standards. You may have noticed that one of the packages we installed earlier was eslint-config-airbnb. For this project we are going to use Airbnb's JavaScript Standards and extend them where we see fit. Add the following file in the same directory as package.json.
{
  "extends": [
    "airbnb"
  ],
  "rules": {
  }
}
When we run our new lint script, it will make sugestions for some files we do not intend to check. This is where the .eslintignore file comes into play as it allows us to ignore directories and files we do not want to lint.
.DS_Store
.env.example
.env.example
/node_modules
/public
serviceWorker.js
We have defined our standards, set what files to ignore, added our lint script, and added the dependencies for our development environment. Let's run npm run lint to see what problems we have with our code.
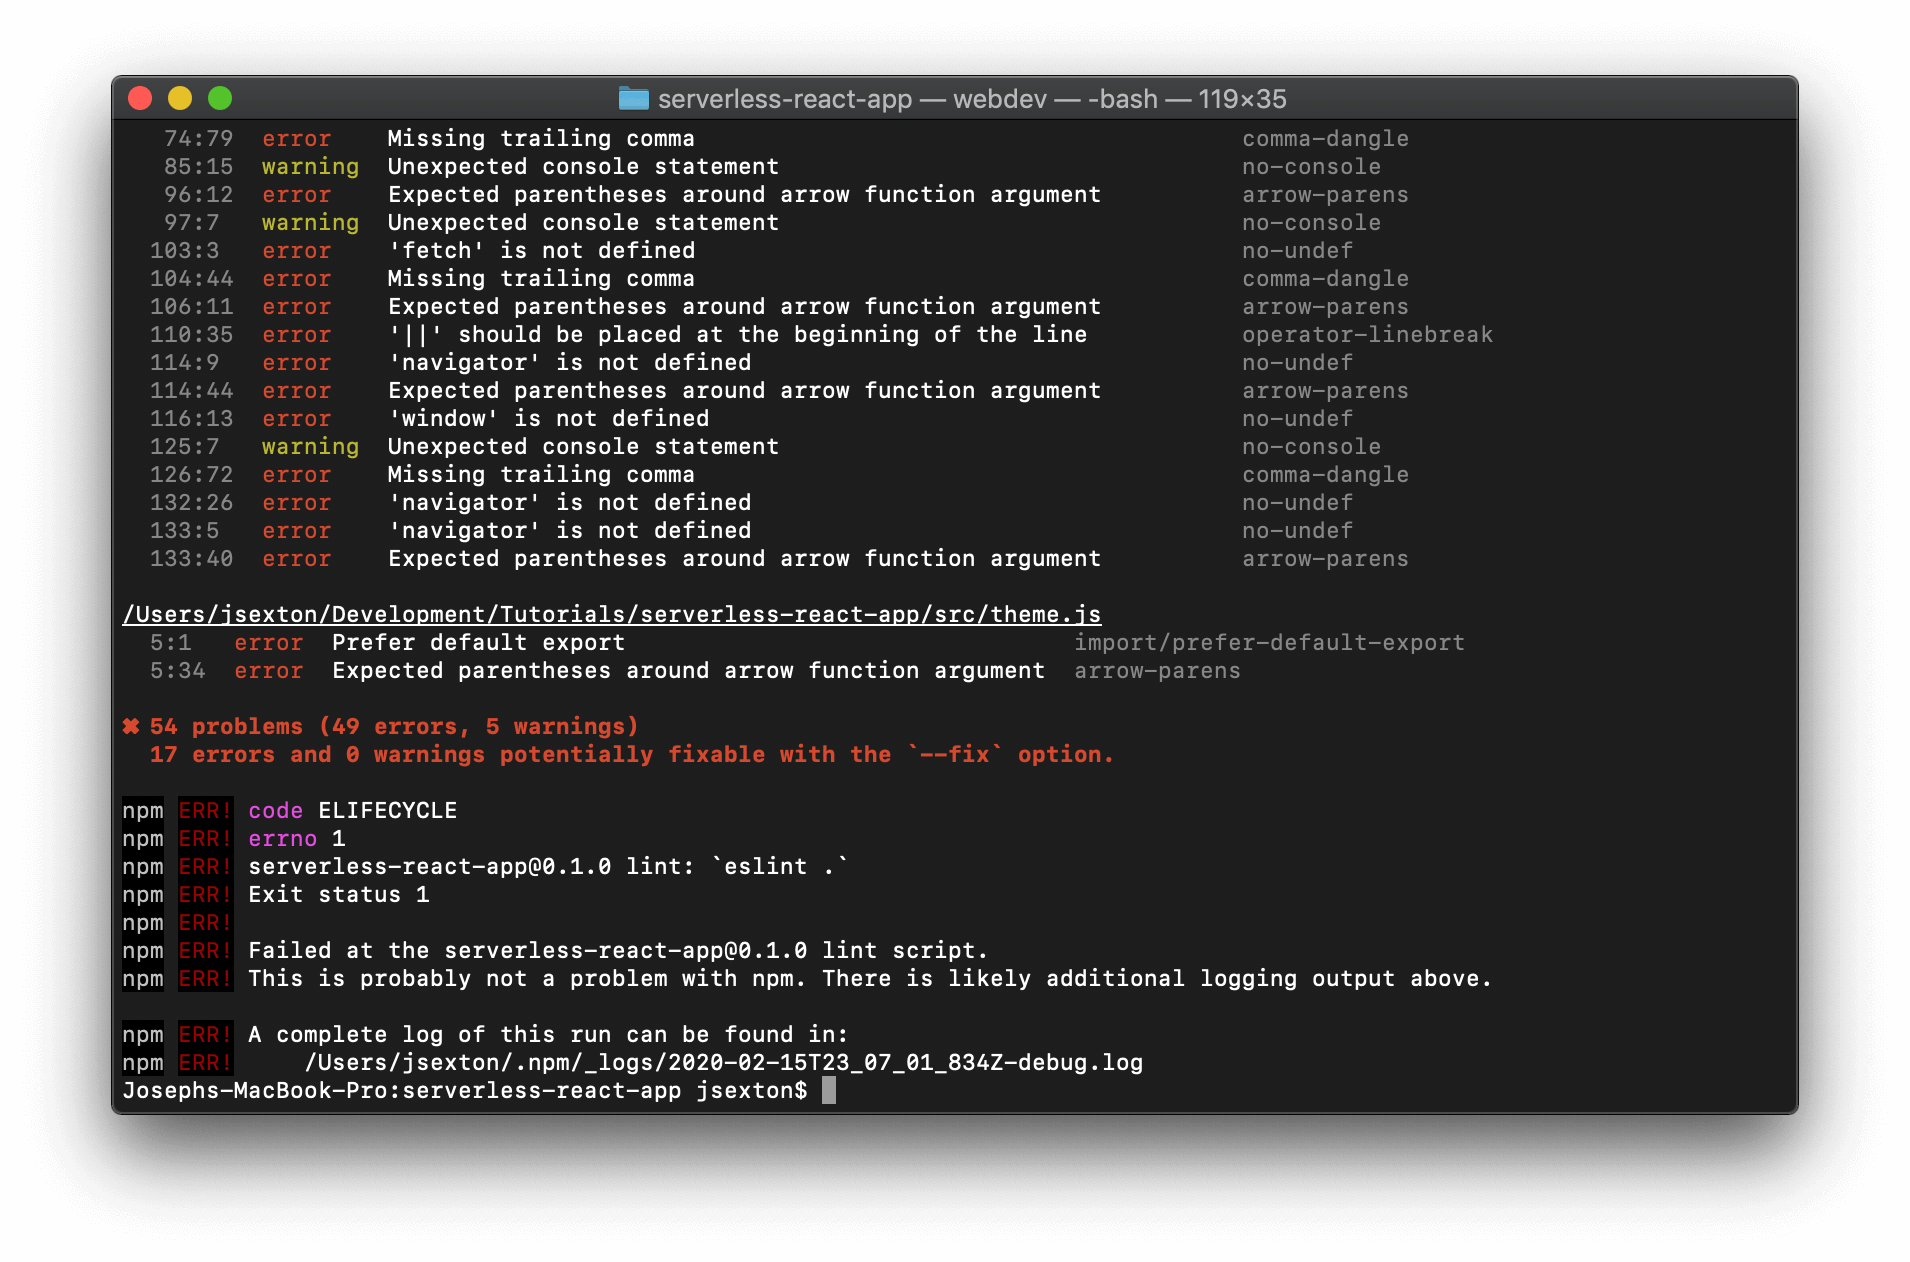
It turns out we are not following our standards very well, and we have a lot of errors to fix. Instead of manually fixing every single one, we can add another script to our package.json. lint-fix will automatically correct everything it can, then we will be left with all the manual work.
...
  "scripts": {
    "start": "react-scripts start",
    "build": "react-scripts build",
    "test": "react-scripts test",
    "lint": "eslint .",
    "lint-fix": "eslint --fix ."
  },
...
Fixing
Most of our files are .js files yet the linter is yelling at us for not being .jsx. To show an example of customizing our standards, we are going to update our .eslintrc.json file to look like the following.
{
  "extends": [
    "airbnb"
  ],
  "rules": {
    "react/jsx-filename-extension": [1, { "extensions": [".js", ".jsx"] }]
  }
}
To show an example of how to ignore a particular rule in a single file, we are going to add a new line to the top of index.js and App.test.js.
/* eslint-disable no-undef */

import React from 'react';
...
The file to update is going to be theme.js. Currently, we only have one export, and our standards would prefer if we didn't use named defaults. In the future, we may have more in this file, so we can ignore this rule as well.
/* eslint-disable import/prefer-default-export */

import { makeStyles } from '@material-ui/core/styles';
...
Take some time to go through the rest of the project and make the needed updates to follow standards. If you get lost, or you are not sure what to do at any point, download the project at the end of Part II. When you finish, you should see no more errors.
Pipeline
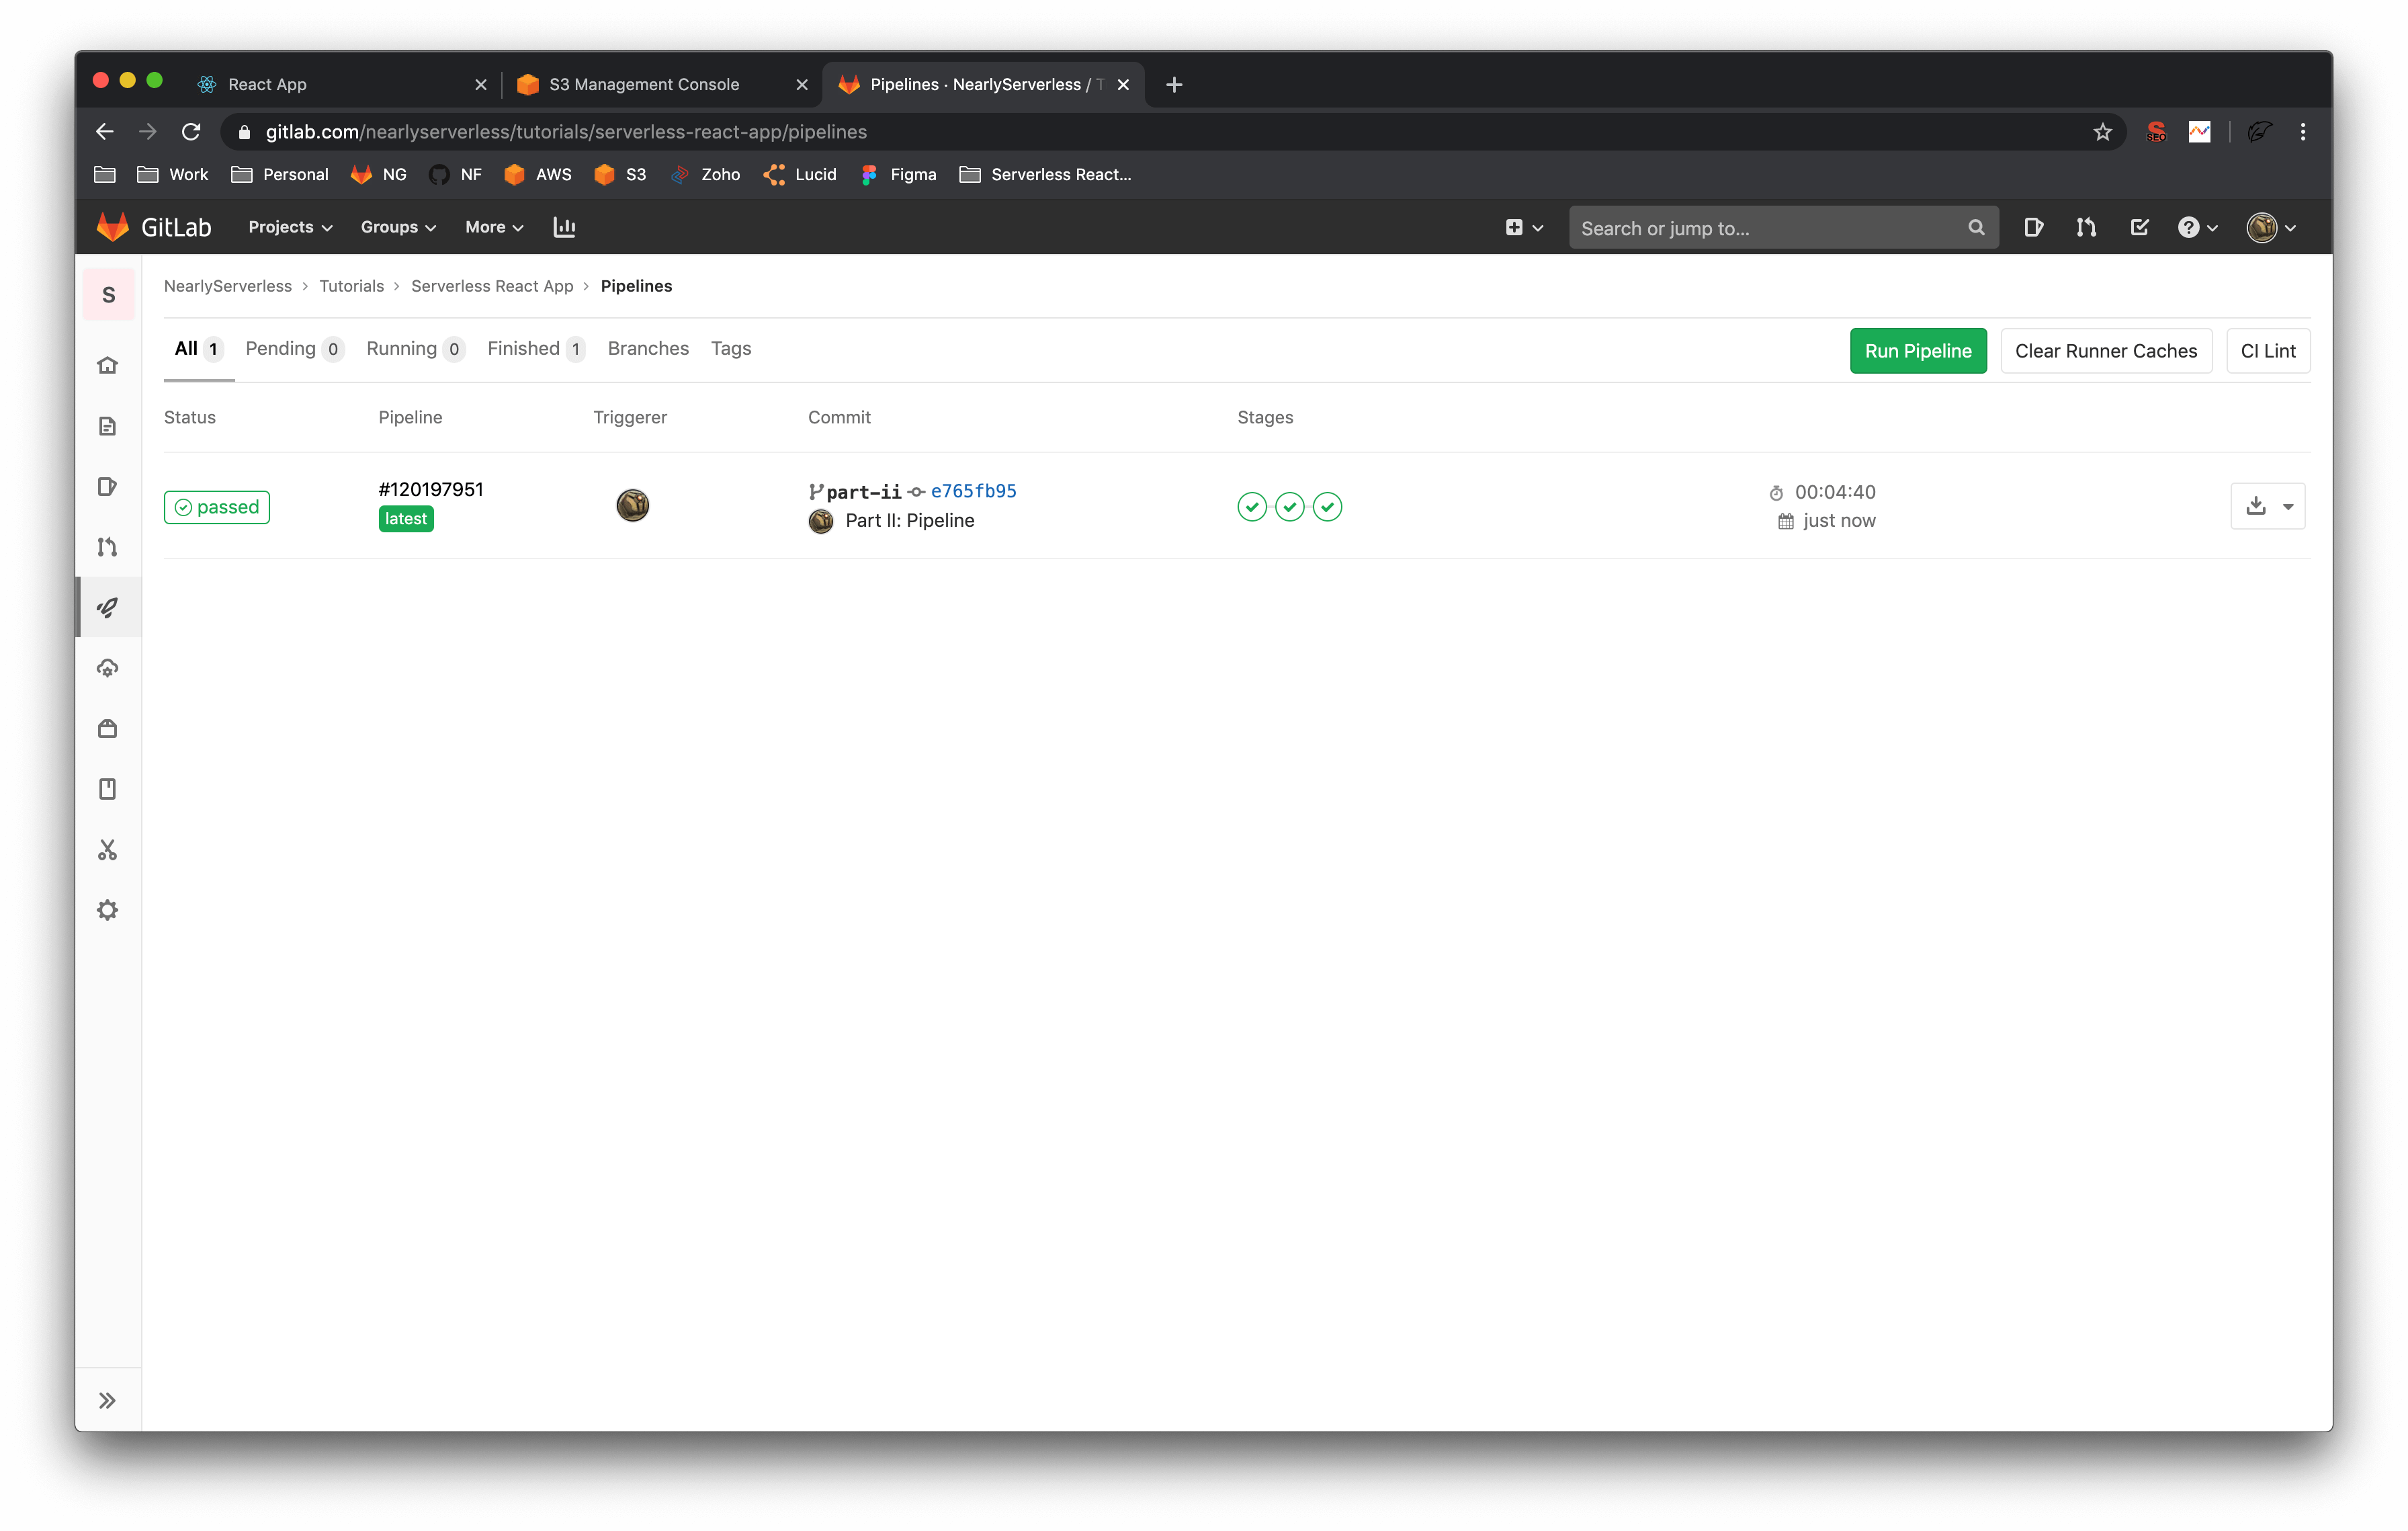
To have GitLab do all this work for us, we need to tell it how. The gitlab-ci.yml file is where we do this. In this file, we define the stages we want to see in our pipeline, and then we define each job we want to run in those stages. One of the many excellent features of GitLab's CI/CD pipelines is the ability to run jobs concurrently and have a dependency chain, so we don't have to waste resources running the same task multiple times. In our pipeline, we want to run npm install once. After the install finishes, we are then capable of running our linter and our tests, but to save time, we can run them together in the same stage. If either of our jobs fails in the validate stage, and the next stage will not start. This process allows us to protect our codebase from problems we can solve with automation.
image: node:latest

stages:
  - install
  - validate
  - build

install:
  stage: install
  script:
    - npm install
  artifacts:
    paths:
      - node_modules

lint:
  stage: validate
  script:
    - npm run lint
  dependencies:
    - install

test:
  stage: validate
  script:
    - npm run test
  dependencies:
    - install

build:
  stage: build
  script:
    - npm run build
  artifacts:
    paths:
      - build
Push your changes to the repository, and you should see your pipeline succeed, assuming your local npm test and npm run lint were successful.
Download the Part II project here.
This concludes part II. We will pick up in part III with the deployment of our React application.
Community
If you have questions, comments, concerns, please voice them on Twitter.